Showing posts with label Quilting. Show all posts

Friday, September 03, 2010

Elmo's Baby Quilt and Pillow

**dusts off cobwebs** Well, hello there! Long time no see. We certainly didn’t intend to take such a long blog break, but as usual life happened and we’ve been busy! After all, running after toddlers can really put a dent in your free time ;) But I am super excited about my latest quilting project and I couldn’t wait to share it with you!

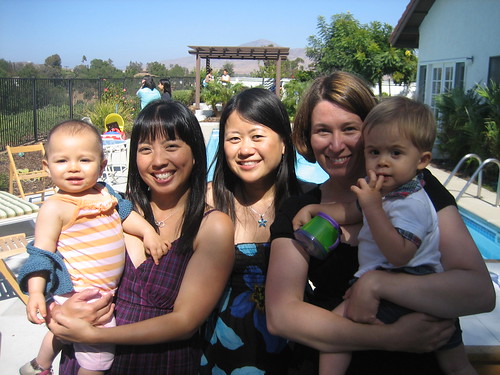
As some of you long-time readers my recall, we are actually a threesome. But knitting had to take a sideline for Nasus while she went to law school, took the bar, and became a practicing attorney (Yay, Nasus!). However, we are happy to report that Nasus is expecting her first child, a little girl, this coming October…which of course meant a good excuse for a new quilt!

Stacked Quilt - top

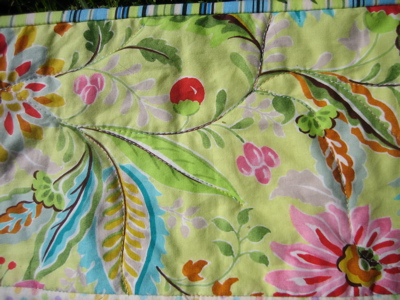
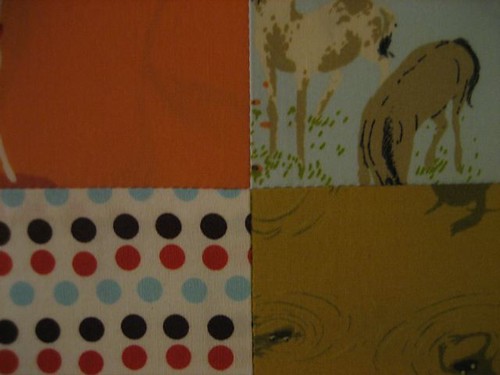
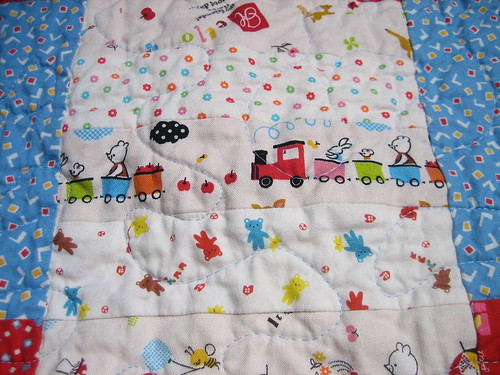
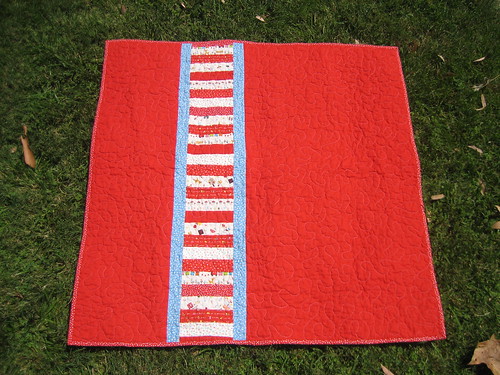
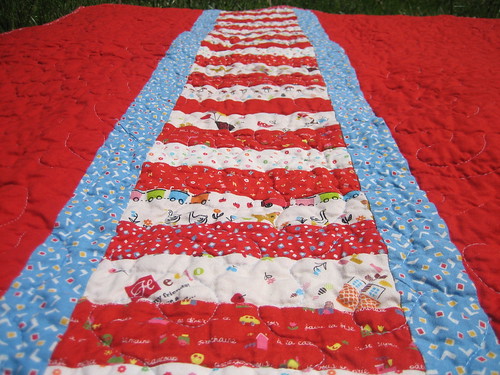
Last year at the Long Beach Quilt Show, I put together some Japanese import fat quarters from a couple different booths. I fell in love with the cute and charming little prints and knew that I wanted to feature them in a quilt project. I found some nice coordinating red prints to go with the cream character prints. When I got home I put everything away and promptly forgot all about them.

Stacked Quilt - top close up

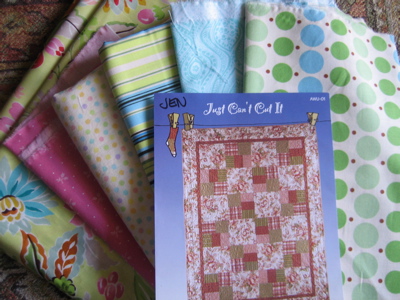
When we first found out that Nasus was pregnant, I immediately started scheming for an appropriate project. I had initially planned to use some of my Riley stash, since it is pretty girly, but when I went digging through everything, I came across the Japanese prints and instantly knew those were the prints for Nasus. I knew the red and cream with be a good fit for this project, since Nasus is a bit on the nontraditional side, like me, when it comes to pink=girl/ blue=boy scale of baby items. Plus, although in my heart I knew she was having a girl, Nasus hadn’t actually found out the gender of the baby when I started this project.

Stacked Quilt - binding close up

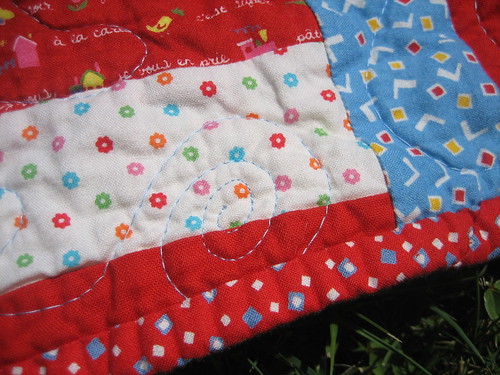
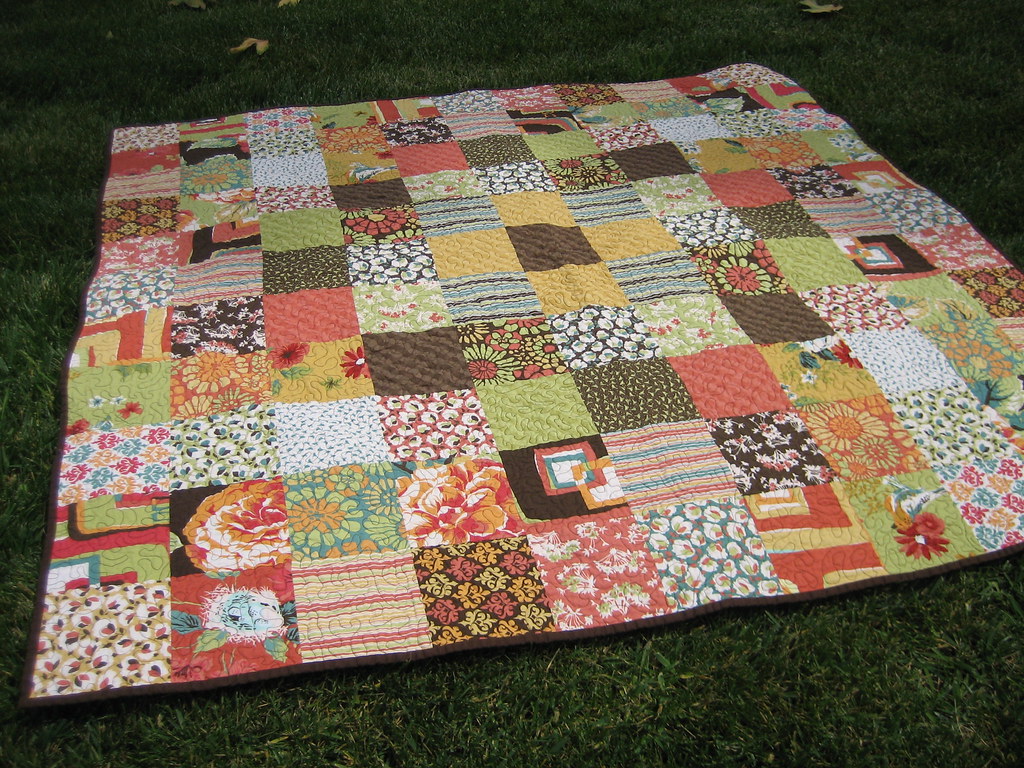
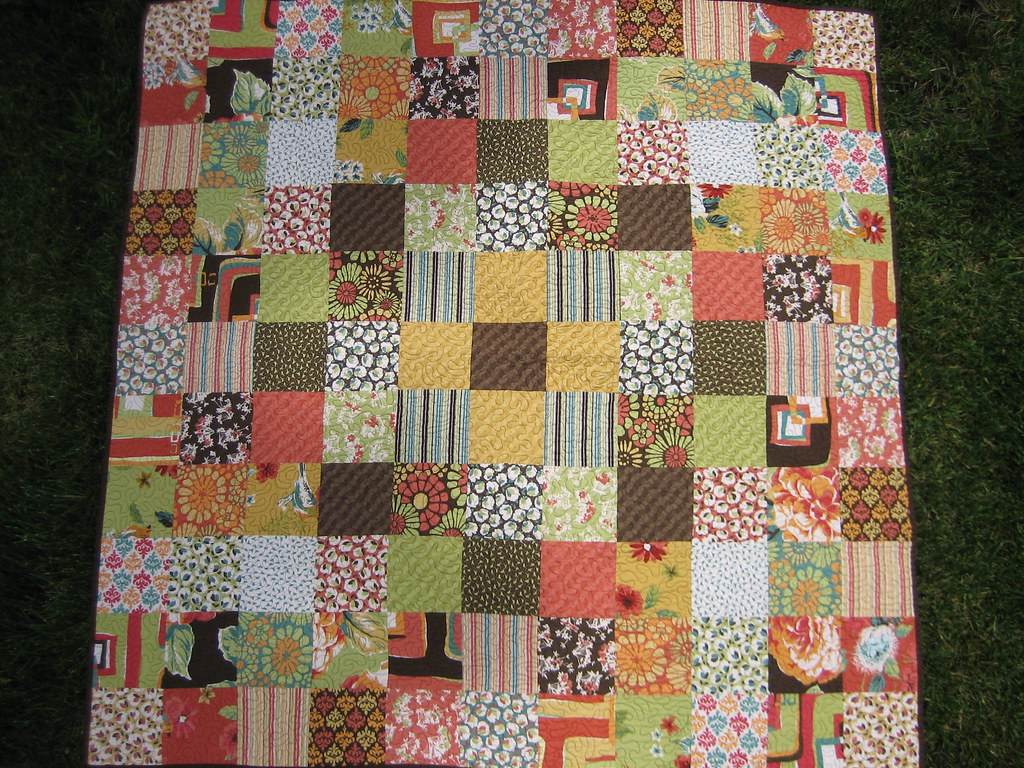
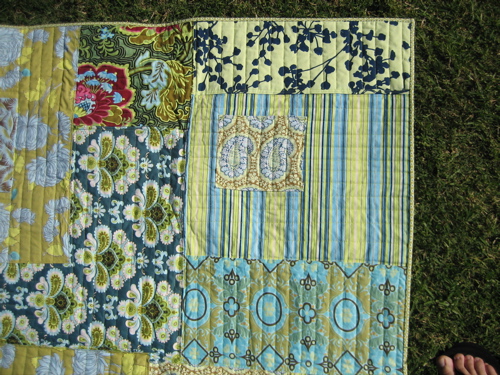
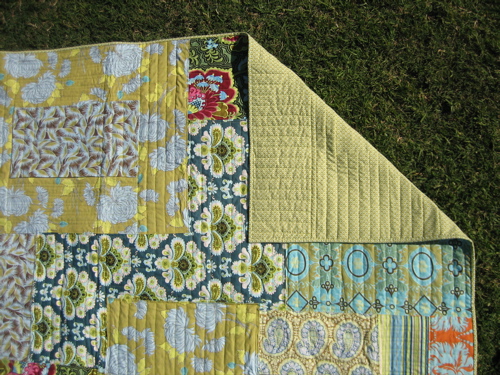
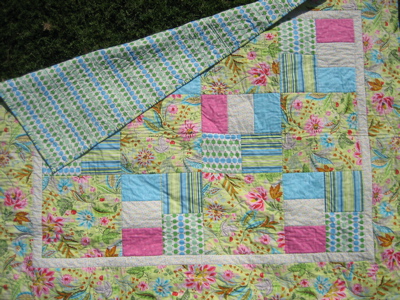
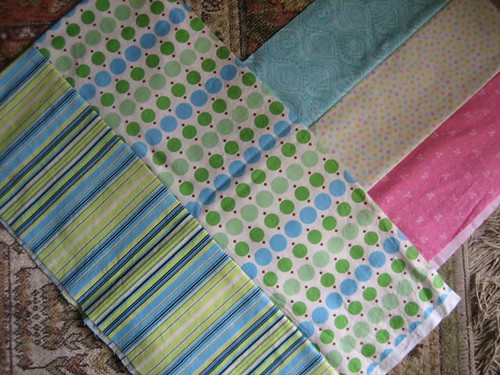
I played around with a stacked coin idea for this quilt, but when Oh, Fransson! re-released her Simple Modern Baby Quilts pattern, the stacked version was perfect for the fabrics I had.

Stacked Quilt - back

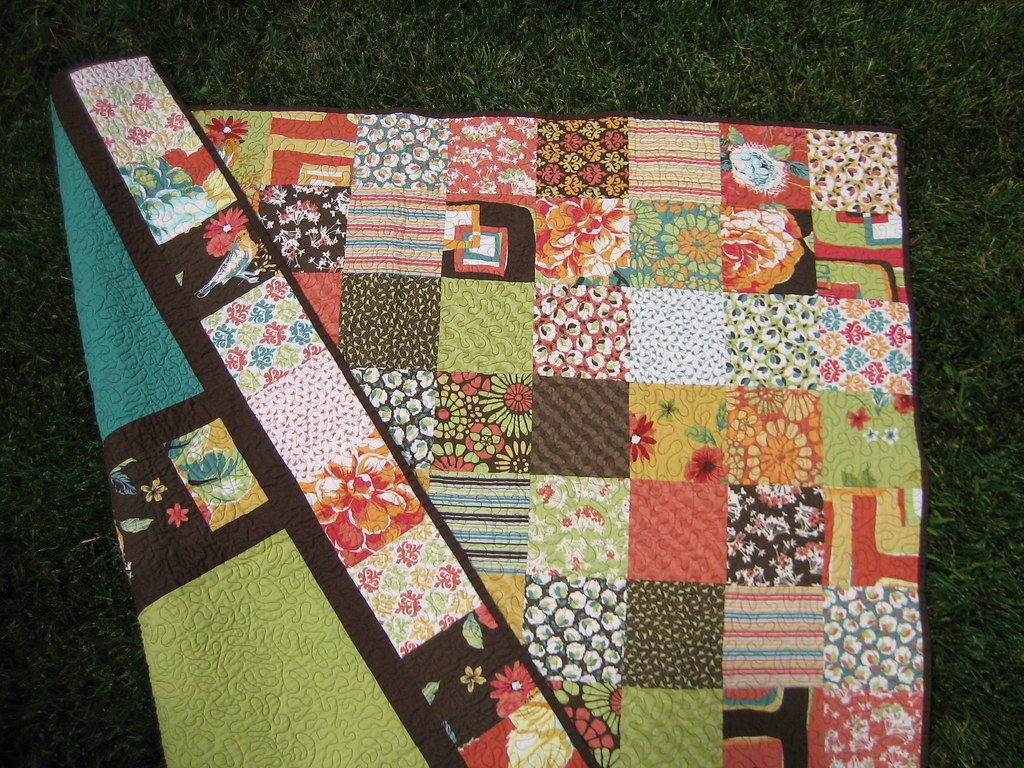
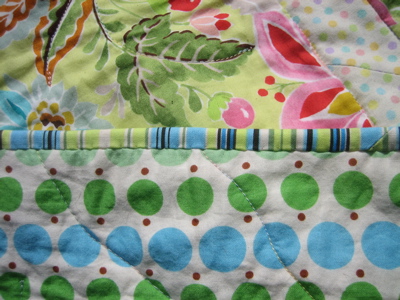
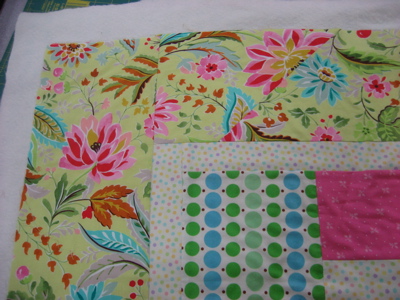
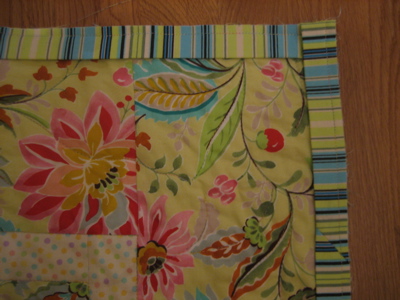
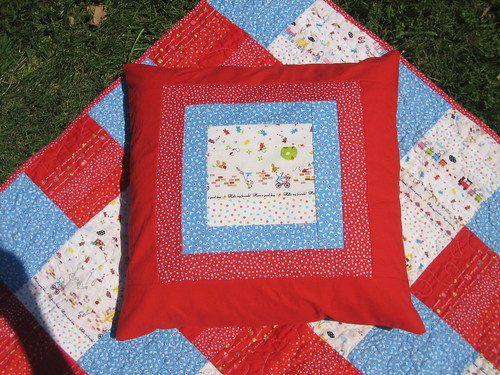
In addition to the Japanese fat quarters, I added the primarily blue print (also a Japanese import) and the red with blue checks print for the binding and some of the red ‘stacks’. The solid is a red Kona solid, I believe in tomato. These additions came from Levine’s during my first ever trip to the L.A. fabric district. (So much fun! I was like a kid in a candy store!)

Stacked Quilt - back close up

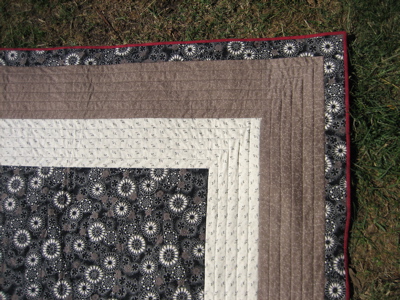
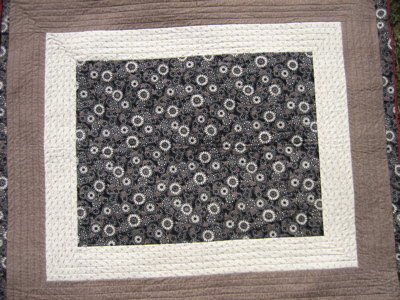
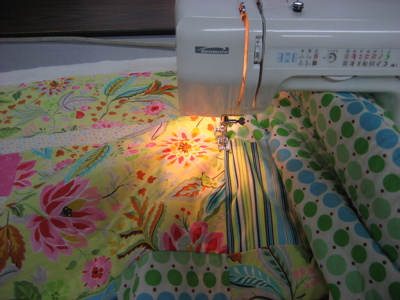
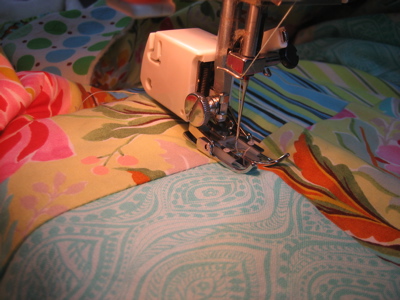
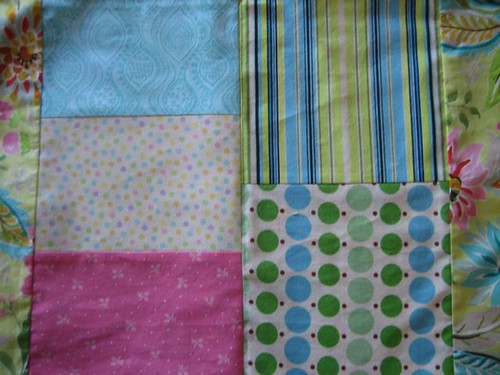
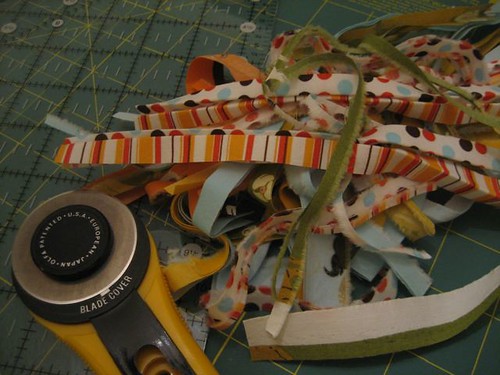
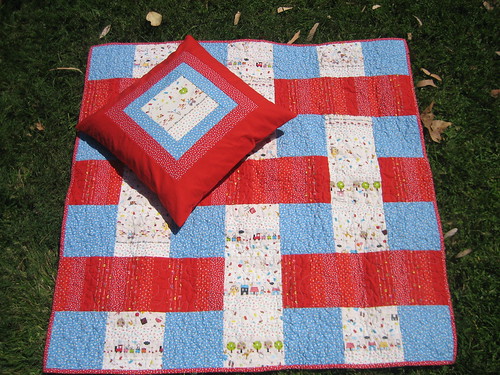
The piecing of this project was super easy, although I learned that I need to work on my ‘scant ¼ inch seams’. And with the extra bits leftover from the quick piecing method used to make the blocks for the quilt, I decided to make a coordinating pillow.

Stacked Quilt - top with pillow

Now, I know babies don’t use pillows and when I received a similarly sized pillow for my own baby shower, I couldn’t imagine what I would ever use it for…until Elliott got close to a year and loved playing with our pillows. Then it dawned on me that he was physically mature enough that a smooth pillow was no longer a serious suffocation hazard. I put his pillow in his crib and the rest is history! It is now one of this favorite things and he falls asleep every night on his pillow.

Stacked Quilt - top with pillow

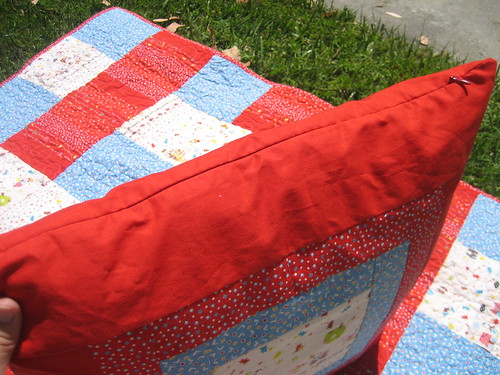
I’ve never made a pillow before and thought it would be fun. I more or less winged the pattern, just playing around with my scraps. I also wanted to add a zipper so that the pillow could be washed when the pillow inevitable got blurped on or smeared with godknowswhat. I learned how to put in an invisible zipper and while it certainly isn’t perfect, it really makes it look more professional. B was very impressed ;)

Stacked Quilt - top with pillow

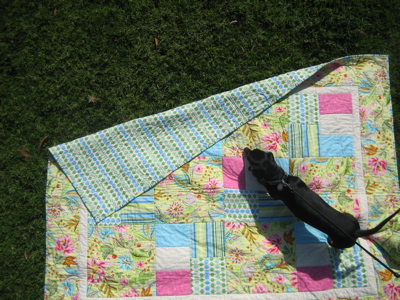
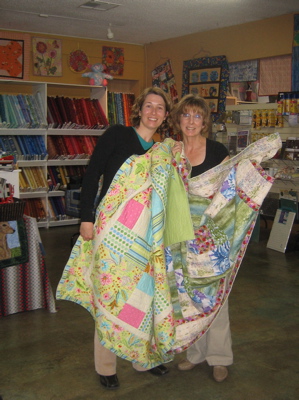
So there you have it…Elmo’s baby quilt and matching pillow. I can’t wait to meet Nasus’ little girl and I hope she enjoys her gifties!

The Girls and their Babies

Sunday, May 02, 2010

Elliott's Birthday Quilt

In honor of Elliott's first birthday I held a little contest over on our family blog. Part of this was to help some of my family members get a little more comfortable leaving comments on a blog, but it was also a great excuse for a new project...this time a quilt!

Birthday Quilt - top

Last year I visited the Long Beach Quilt Show where I scored four Moda Blossom charm packs for $3 a piece. I was even more fortunate to have an extra piece of a nearly solid brown print in one of the packs. As a result, I was able to use this extra square as the center of a radiating pattern that repeated the other fabric prints outward in a very deliberate patchwork layout.

Birthday Quilt - top

Finished dimensions: ~46 x 46

I didn't use a pattern for this quilt, but just started from the center and laid out the prints in what I was hoping to be an appealing manner. As is usually the case, B was able to help me tweak my 'good' layout into something really nice. (I was originally going to have all 5 of the dark brown prints as an anchor in the middle...like a big plus sign. B showed me how by alternating the color themes of the prints and pulling those brown pieces farther out it didn't look so heavy. And trust me this looks SO much better!)

Birthday Quilt - back

The back is pieced with Kona cotton.
(Excuse the askew photo - it's really hard to take full quilt pics by yourself!)

The back of the quilt ended up being a very happy accident. My original plan was to have a strip of the leftover charm squares running down the side and perpendicular to three solid panels of different colors and widths making up the rest of the back. (Un)fortunately, I cut my brown fabric the wrong way when I was cutting my binding fabric and no longer had a piece large enough to span the entire back. I was just going to buy more (which killed me!!), but then I thought I would lay out the pieces of the other two colors to see how much space was really left unaccounted for. Turns out? Not much. By making a 'T" with the leftover charm squares and using some of the brown that I cut incorrectly as sashing, I came up with my design.

Birthday Quilt

(Un)fortunately, what this mistake also presented was a new challenge in quilting the front and back. I've only previously quilted straight on my machine. However, if I quilted in the ditch or even ran parallel lines down the squares on the front, I was going to have issues with my quilting lines matching up to the lines on the pieced back. Now under some circumstances, this wouldn't be a problem. But with the high contract colors of my quilt and the fact that I was using dark brown thread to quilt, those quilting lines were going to look terrible on the back. And it did...especially since I didn't have my back and front perfectly straight when I basted them together...which really would have been impossible under the circumstances (and maybe always? I'm not sure since I'm still a beginning quilter).

Birthday Quilt - back close up

So what's a novice quilter to do? Learn something new! I watched and read a ton online about free motion quilting and finally used Oh, Fransson's free motion tutorial as a guide. Guys, this tutorial was so great! (If you like quilting and don't already know about Oh, Fransson!, you really need to go check her out. So inspiring!) Free motion was the perfect solution to my problem. I was able to mask the slight offset between my front and back pieces and I love the dimension the quilting lines added to the quilt. And it was so...much...fun!! This will definitely not be my last free motion project.

All in all this was actually a very cost effective project as well. The front cost $12 for the charm packs and the backing and binding totalled about $11.50. I had the perfect piece of leftover batting in my stash and used one and a half spools of 100% cotton thread at about $3.50 each. I love being able to make something so economically without cutting corners. I get a internal thrill whenever it works out so well.

And finally, this is my aunt who won the quilt and the contest honoree.

Birthday Quilt - Recipient

I had so much fun working on this project and I loved having a 'soft' deadline. I seem to work best on deadlines...and if I get to set them, its even better :)

Friday, September 25, 2009

Grandma's Quilt, Part 1

I come from a long line of 'makers'. The women in my family have all had very special talents, whether is was sewing, quilting, crocheting, or painting. So I guess I come by my drive to create and make naturally. I am never without inspiration, but these days the time to act on that inspiration is few and far between. I think that's why it's fitting right now to apply my limited project time to something that honors my own history. Specifically, my grandma's quilt.

My maternal grandma is by far the grandmother I have known the best. And at 94, she continues to amaze us with her wit and sense of humor. Unfortunately, time had not been as kind to her hands and she had long ago been forced to put away her embroidery needle and floss. However, she had one project that she was unable to finish. A quilt comprised of embroidered blocks that each feature one of the 50 U.S. states. She had thought it was a shame no one in the family quilted, so this project was slated to be donated to her Church group for finishing. Many years ago I had told her that I would be interested in learning how to quilt so that I could help with the project. It's taken some time, but my mom and I have decided to finish the quilt for her for Christmas. We thought she would enjoy seeing it all put together and we hope that it can serve as some decoration in her new home, a lovely private board and care home run by the most wonderful people that may have ever walked this Earth.

In the last couple of weeks, my mom and I got out the quilt materials and took a look at what was there and what work was needed. My grandma had everything together, the pattern, the quilt blocks and the material she had picked out for the front borders and the back. It was so much fun to open up the pattern and see all of her notes.

Grandma's Quilt

The pattern envelope

You can tell from the recycled return address label that she had mailed away for the pattern. And from there, she used the pattern envelope to complete her yardage calculations. We looked all over for a date or something to age the start of this project. We know at least that she received the pattern while she was still living in her home in Salt Lake City...her home that I grew up visiting as a child.

Grandma's Quilt

Quilt layout and embroidery transfer

The quilt pattern itself is slated to be a queen size quilt of significant size to not only contain all fifty state blocks, but also a rather large embroidered map of the U.S. right in the middle. Each state block contains the embroidered state as well as its state flower, state bird, the year it entered the Union and the order it joined. Fortunately for my mom and I, she completed all of the embroidery work (save a couple unfinished numbers or unknotted state capitals here and there).

Grandma's Quilt

Finished block
PS the rooster is intentionally gray in honor of the revolutionary soldiers


It has also been very interesting to finish someone else's project and to decipher what she did compared to the pattern requirements. The first thing we noticed was that the blocks she embroidered are not the size called for in the pattern. She had arranged them to use as little fabric as possible and thus was planning for a somewhat smaller quilt. Since she really isn't in a position at this point to tell us why, it has been fun to guess. Was this a stash project and she was trying to only use the fabric she had on hand? Was she a conservationist and hated any potential fabric waste? Did she read the dimensions wrong? What I do know from reading all of your blogs all these years and from my own experience, there was surely a reason.

I'm currently leaning on the stash theory as there is one panel of blocks with a clearly different shade of backing fabric. I had originally thought it might have been due to age, but that panel is consistently the same color, rather than only on the top or some other gradient to account for exposure.

Grandma's Quilt

Sample of finished blocks

Now this isn't exactly a pattern I, or my mom for that matter, would normally pick out for ourselves. Its very 'intense' but sparse at the same time (because of the large white blocks and the large central US map). And frankly, it is rather huge. This kind of quilt also walks a fine line in the patriotic department. We ultimately decided that we didn't really need to follow the pattern to the t. Rather, I drew out a new layout of 60 blocks for the front, 50 states and 10 patterned blocks of fabric, and we decided to move the large US map to the back and piece it with the backing fabric. Finally, we also decided that the red fabric she had picked out for the front borders could use a little updating. So, with some sketchy yardage requirements and pattern notes, my mom and I headed for the fabric shop.

Next time: the new fabric and cutting 50 blocks.

Wednesday, October 22, 2008

Amy Butler Patchwork Throw

One part of the reorganization effort going on around our house is finishing up partial crafting projects. And one such project taking up valuable baby-conversion space was the Amy Butler Patchwork Throw from In Stitches that has been in the works since July 2007. I got through a good portion of the project on vacation that summer (farther than I actually planned), but it sat in a bag with all the leftover fabric on the floor of our bedroom since then...and yes, we are a tidy folk ;-)

Over the last year, I've thought about reviving this project many times, but I knew that it wasn't going to be pretty. There were a lot of problems with it when I put it away and I kept envisioning the nightmare that quilting on a jacked up quilt top was going to be. The positives were that since beginning the original quilting, I had since purchased a walking foot for my sewing machine and completed a ton more quilting and sewing projects. I knew this would help with some of the pulling and puckering issues...but nothing was going to erase the poor sewing on the top of the quilt. And like most things, it pays to have the right equipment for the job and the quilting ended up going much smoother than I had envisioned.

Amy Butler Patchwork Quilt

A word of warning for those attempting to make this project...it's a bit strange at least in my limited experience. You don't actually piece the top together like you would for a normal quilt. You sew a large piece of muslin together then attach the patchwork top pieces according to the pattern. Then you (basically) applique another layer of smaller patchwork pieces to the throw top. Then you sew it all together. I'm sure you can see now all the room for error in this project when you have a novice sewer without the proper equipment.

Amy Butler Patchwork Quilt - Corner

Another issue that caused even more inconsistency problems was that I hand cut each fabric piece with scissors...not a rotary cutter and mat. I also pin basted the throw together...which I will never do again. While I'm generally one for the less gimicky option when it comes to things, I really do love my adhesive basting spray. It keeps things so smooth and wrinkle free, which really helps in eliminating puckers and other problems.

Amy Butler Patchwork Quilt - Top

Now, lets talk about the fabric choices for a moment. I saved a ton of money on these. Mainly because I actually figured out how much I needed rather than going by the generous recommendations in the book. This saved me about 1/2 of the fabric requirements! I also got them online and on sale. I did my best to pick out things that would work together, but there are a few that I would not have put together if I had been selecting these in person. The good thing is that because they came from an Amy Butler line that was current at the time (Belle), the colors do coordinate. For example, the same robin's egg blue is seen in almost all the prints. However, there are a couple 'spotlight' fabrics that dominate a bit. I'm not worrying about this issue, since the patchwork nature of the throw is more hodge-podge than matchy-matchy.

Amy Butler Patchwork Quilt - binding/backing

As for the quilting itself, this is where I stopped looking at the pattern. I just randomly quilted lines on each piece of fabric in alternating directions using the guide bar on my walking foot. In a couple places, I mixed it up even more and made slanting quilt lines or lines in alternating sizes. I didn't worry about being crazy precise here, but the guide bar does help you fake symmetry really well ;) Finally, I backed and bound the throw with the same fabric. You can see a better representation of this particular fabric here.

This is a project that I am happy to be done with. Given all the problems, I am very happy with how it came out. I'm also very happy with the leftovers that I am now in the process of turning into bibs...wonderful bibs of many colors!

Tuesday, September 16, 2008

Nonnahs' Wedding Quilt

I knew I wanted to make Nonnahs a wedding quilt as soon as they decided to get married this September. It just took me a while to pick just the right one. I knew I didn't want it to be too busy and more classic looking, but I also wanted to take advantage of some of the great contemporary fabric out there. I hit pay dirt with the Cutting Corners pattern from Last Minute Patchwork & Quilted Gifts.

Nonnahs' Wedding Quilt - Detail

It is simple, yet interesting and offers a great combination of straight lines and floral 'roundedness'. For colors I had two main inspirations: Nonnahs' fairly neutral living room and, of course, the Doogles. So I went to the fabric store and shopped the black florals until I found the perfect one: plenty of black but enough cream and taupe to give me something to work with in picking out the border fabrics. The rest came together pretty effortlessly. I was also inspired to add the red binding because there is the tiniest of red in the floral print on the inner cream border fabric...plus red is such a 'love'ly color! I opted for a solid black backing mainly for the practical purpose of living with a (mostly) black dog.

Nonnahs' Wedding Quilt - Top View

Main Print - Michael Miller for Fabrics LLC
Cream Inner Border - 19th Century Backgrounds II for Marcus Brothers
Taupe Outer Border - Floral Damask by P&B Textiles
Binding - Little Red Riding Hood for Red Rooster Fabrics
Backing - Black Solid Kona Cotton from Robert Kaufman Fabrics

I also knew that I wanted to add some kind of inscription to the back. I went back and forth about embroidering their names and/or the date of the wedding. But, nothing seemed 'just right'. I was also mildly afraid that by adding their names and date it would turn more into something that's kept in a closet vs. something that is used...and if its up to me (ha!), I'd rather it be something that's used! Then a lightening bolt stuck! I could add feng shui love birds to the back! Again, this idea went through many incarnations and it didn't materialize into the final product until I was putting everything together (mostly because of trial and error):

Nonnahs' Wedding Quilt - Back Patch

I used the side bird template from the Bird Ornaments pattern, also from Last Minute Patchwork & Quilted Gifts, on fabric treated with iron-on fusing. I used a 'fancy' stitch from my sewing machine to applique the birds to the backing (also fused). Then I invisibly hand stitched the patch to the quilt back (like when you attached binding). Considering this was completely winged (no pun intended ;), I really love how the patch came out.

And finally, what would a quilt project be without fabric leftovers...which were promptly turned into a set of Quilted Coasters, again from Last Minute Patchwork & Quilted Gifts.

Nonnahs' Quilted Coasters

I do believe Nonnahs will be an absolutely beautiful bride, don't you think!?! :-)

Wednesday, March 12, 2008

Nonnahs' First Quilt (the show & tell continues!)

Since Dis just shared her adorable first quilt with us, and since I recently stumbled upon my first quilt again by chance, I thought I would share mine, too. This photo makes me so happy, I can't even tell you.

First thing's first. I don't think I've blogged about my sewing yet, so I guess I'll start at the beginning. I learned to sew (and embroider and cross-stitch, etc, etc) from my paternal grandma. I owe so much of my craftiness to her. I remember being very little (pre-school age), sitting with her at her sewing machine- she would press the peddle as I helped her feed the fabric through. Eventually, I got my own little, kid-sized machine and we would sew side-by-side. She was big into patchwork quilts. It was the early 70s in Hawaii, mind you, so these were some seriously bright quilts! I remember helping her cut out squares (with scissors - no rotary cutters back then), sew them together, then press the seams open. We also made aprons, but I'll save that for another post.

Fast forward to the summer before 7th grade when Dee and I took a sewing class together at a local Bernina store (she will correct me on the year, if I'm wrong). That's when I learned to read and follow patterns. Until then, free-form sewing was all I knew. I made some really ugly early 80s clothes in that class. But, that's okay, it was fun- and I was learning.

Fast forward to college, when my stepmom gifted me a sewing machine (that I still use- bless it for hanging in there all these years). I really got into sewing some of my own clothes (dresses, skirts, pants). A few years later, Lisa was pregnant with her first child, and since I was going to be an aunty* for the first time and excited as all get out, something made me want to sew a baby quilt. I picked up a random book of baby quilts from a fabric store and fumbled my way through it. I didn't really know what I was doing, but I knew (and remembered) enough to get by.

My first quilt was a baby quilt for Jack, who is now nearly13 years old. (Holy crap, is my boy almost a teenager? *shudder*) When I was at that cookie swap, I went looking for a kid and wound up finding a deserted fortress compound. To my delight (understatement), what did I see as one of the fort walls? That's right! Jack's quilt! The photo quality isn't the best, but I couldn't resist sneaking a picture of it, as is, before the little ones returned. The scene was too precious to pass up.

I'll have to ask Lisa to get a better picture of it, but for now this works. I love seeing it in this context. I can't tell you how much I love the fact that it's being used as part of a fort! Lisa, Dee, and I made similar forts like this when we were little, too.

* When you grow up in Hawaii, pretty much everyone older than you is considered your Aunty or Uncle, whether you're related to them or not- it really doesn't matter.

Sunday, March 09, 2008

First Quilt

As promised, here are the finished object photos of my first quilt. The quilt called Just Can't Cut It from All Washed Up was made as the class project for the ABC beginning quilt class at Sowing Sisters in Carlsbad. It was a bit of a drive to get there for my Wednesday night classes but fortunately my office allowed me to work a slightly different schedule (6 am to 3 pm - ouch!) on class nights. But it was all worth it:

Quilt - Completed first quilt

As I mentioned in one of my earlier posts on this project, the little pastel dots from the Moda Monkey'N Round line by Erin Michael served as my inspiration, but inspiration quickly shifted when I found that lovely bright floral (which I've managed to cut off every trace of the manufacturers information from my leftover scraps). I also used the green and blue dots from the Katie Jump Rope retro collection from Denyse Schmidt as an accent block as well as my backing. This made for some real fun trying to line up my dots for the back seam. (Note to self: use solids or semisolids for backing!)

Quilt - close up of binding

I used both the dots and the striped binding (from Amy Butler's Belle line) to provide a balance to the predominance of the florals on the front. And I am really pleased with the result.

As for the quilting, I wanted to provide a close up of the stitching lines I followed for inside the large blocks and the outer border:

Quilt - close up of stitching

Again, the viney lines were a nice contrast to the more ridged ones surrounding each of the pieced blocks and around the inner border.

I also knew that the quilt was a winner in our house once it got Jenny's approval. As soon as it hit the grass for the photos, it was all B could do to keep her off of it...and eventually, he lost:

Jenny and Quilt

Thanks for indulging me in this quilting diversion...I promise next up - more knitting!

Monday, March 03, 2008

Now we're quilting!

My quilting class is officially over and so is my quilt! But I'm painfully behind on blogging, so I thought I would take this moment away from an unexpected solitary evening to share a little more of my progress.

Once the quilt top was pieced and the borders added, it was time to piece the backing. I decided to use the same green and blue dot fabric for my backing with the hopes that it would be a nice contrast to the heavy florals on top. We used a spray adhesive (that I had no idea even existed!) to baste the top, the batting and the backing together with no pins and no hand sewing. The little sandwich looked like this:

Quilting - Basted

You can see the batting sticking out around the edges. You use this overhang to help square up your quilt once all the quilting is done...which is what we did next:

Quilting - stitching in the ditch

We stitched in the ditch in a radiating pattern from the center out to the inner border. We then went inside the quilt and stitched around all the small pieced squares. This particular batting is apparently pretty nice and had a pretty wide quilt line recommendation - I think 6 inches apart. The quilting line requirement is related to the stability of the batting. If it is weaker batting (i.e. may pull apart or bunch up with wear and wash), closer quilting lines are usually recommended to compensate.

Because we had 12 inch blocks, each of us were able to pick a stitching 'method' that would accent our individual quilts best and close the gap between stitch lines. My teacher had the great idea of me using the vines and leaves in my florals to trace with my quilting lines. I loved the idea and followed that method across for each 12 inch block and throughout my outer border.

Quilting - pressure foot close up

We also used the groovy device above to help keep an even pressure on all of the quilting layers while we stitched. It's a pressure foot and compresses the materials together as it moves under the needle. It helps to reduce the puckering you would see on the back of a quilt with uneven tension of the feed dogs and a regular foot. (However, this puckering is not to be mistaken with the crinkly look of a washed cotton quilt...that texture is fully intensional and often times desired!)

Once all of our quilting was done, we squared up our quilt by cutting off the extra batting and backing in an even width around the entire quilt. We then learned about attaching the binding. 'Squaring and binding night' was probably the most technique-intensive class out of the 6 class series. Our teacher had us practice our bindings on scrap pieces about the size of a potholder. Once we had the basics down, we moved on to our quilt and machine stitched the binding to the front. We then pulled the binding over the edge and hand stitched the edge down on the back.

Quilting - attaching the binding

This is what mine looked like before I sewed it down on the back. (Just pretend the corner is square please. ;-) The hand sewing we finished at home. I finished my class last Wednesday and over Thursday and Saturday evening had the binding all done.

Now that we are finished, I'm really going to miss going to class. We had a great group of students and everyone had a great time. You can see a few of the other examples of quilts from our class here at the Sowing Sisters blog. However, I also wanted to show you a peak of the quilt from my favorite class companion, my mom!

Quilting - our quilts

We've never had a chance to do anything like this together and since the class was in her neck of the woods and during the evening (easier for her to get away since she cares for my 92 year old grandma), it was really a perfect opportunity. We had a great time and had a nice little tradition of getting a bite to eat each night before class. This weekly time with her will definitely be what I miss the most. But all good things must come to an end and I will have finished object photos to show you soon!

Saturday, February 16, 2008

Lots of cutting, lots of sewing

I fully intended to take photos of my quilt class project at every major step, but with the pace that we work at in class, I kept forgetting to get out my camera. And then it seemed like anytime I was at a 'photo spot' during the week there wasn't any decent light. So, I'm going to cheat a little and just skip past the fact that I don't really have any photos of my pieced blocks coming together. I did manage to take a photo of this interesting step in the quilt process (at least this particular quilt process), since being a novice quilter myself, I had never even dreamed you could construct blocks this way.

Class Quilt - strips cutting

Basically, for each of the pieced blocks, you put together one side made of three smaller pieces and one side of 2 larger pieces. I had assumed before I started the class, that all five pieces would be cut out and sewn together for each of the blocks. Wrong! You create each side of the block by cutting long strips of fabric, sewing them lengthwise and then cross cutting them into the final 1/2 block size to get this:

Class Quilt - pieced blocks

It seems this method would lend itself best to projects where you are buying the fabric specifically for it or if you have an amazing fabric stash because you really need the lengths (we cut the first strips from bias to bias) to be most efficient. Fat quarters would require some adjustments since you don't have the length to do all your pieces in one strip.

Now the other cool thing we learned how to do was match our corners. I was thoroughly intimidated by this when our teacher showed us her sample quilt and it was perfect! Each little corner made a perfect intersection with its three mates. I had resigned myself to the fact that this would not be the case on my quilt...and to be honest it isn't for 1/2 of mine. But! I pulled out a fat quarter pack of fabric I had and set about to practice! And look!:

Matching corners - front

It's all about alternating the seams on the back! Who ever would have guessed!?! Basically the technique is that when you plan out your quilt, one of the things that gets planned is which direction each row's seams are going to be pressed. So for the quilt top above that is made of 6 rows of 5 squares, I alternated the direction of the seams from one row to the next. This makes for a nice little interlocking seam at your corner that you can match up, bump end to bump end, pin together and sew a perfect corner. This is what it looks like from the back:

Matching corners - back

You can see how the seams when alternated make a pretty little spiral, letting everything lay flat and line up evenly! But you know what else I think is pretty? The scraps. I love the little pile of coordinating scraps you get when you are cutting everything up. They are almost too pretty to throw away!

Fun with a rotary cutter

So I took a picture...It will last longer.

Wednesday, February 06, 2008

A little side project...

Thank you so much for all of your wonderful birthday wishes! They really did make my birthday special, which was much welcomed since I ended up getting the plague a couple days before. Nice timing, right? Anyway, being sick didn't (for the most part) keep me from enjoying what turned into my birthday week. Because it fell on a Wednesday and on a class night at that (more on that below), it worked out best for B and I to go out for dinner Friday...which coincidently coincided with San Diego's Restaurant Week (YUM!). Nasus and K also whisked Nonnahs and I away for a little wine getaway last weekend, but I'll let one of them tell you the details. All in all, not a bad way to start out 33.

As for my class, I decided to take a quilting class offered by one of our local quilting shops. I realized last summer when I started making some simple skirts that I couldn't get enough of the fabrics out there. So many colors, so many themes, so many opportunities! But, I just wasn't drawn to garment making. I did, however, find that I got really excited whenever I saw these fabrics in a quilt or a pillow or a 'thing'. This is an interesting fact considering that I am almost completely opposite in the way I feel about knitting, where I almost always choose to knit a garment over a 'thing'.

I played around with making a throw this summer on vacation and while I could follow the pattern, I quickly realized that I was in desperate need of the techniques you learn from a class and a teacher. After quite a bit of research, I found a class that was exactly what I wanted. It takes me from picking out the fabric to a finished quilt in 6 weeks.

In the first class we selected our fabrics. Now, I'm a sucker for those cute and coordinated fabric packs that fabric shops sell, but I was determined to learn how to select fabrics outside of a designer's line or collection. So on the first day, I brought a piece of fabric (the cream fabric with the little pastel dots) with me to serve as my inspiration. I had originally purchased it online several months ago to go with another fabric for a skirt. But once it arrived and saw it in person, I knew the two would never work right together. It also isn't a fabric I was likely to wear, so I thought, here's a chance to actually use it!

Quilt Project - Just Can't Cut It

I knew I didn't want a pastel quilt, so I walked my fabric around the shop until I found something that would bring the pastels into a brighter color pallet...the pretty floral print on the left. With these as my anchors, I found 4 more fabrics that combined fun colors with various stylistic elements to mix it up a bit. The photo below will show you more or less how the fabrics will look in their relative sizes to each other in the final quilt.

Quilt Project - Fabric Choices

The floral will serve as my large blocks and outer border and the other 5 fabrics as my pieced blocks. I will also use more of the small pastel dots as my inner border and the stripe fabric as my binding around the outside. I think it will provide a nice contrast to the floral border, plus I love the way striped bindings look on quilts :-) .

I'll share some more photos as the quilt starts to come together! I'm really excited to see the blocks done and the top sewn up. Wish me luck!